


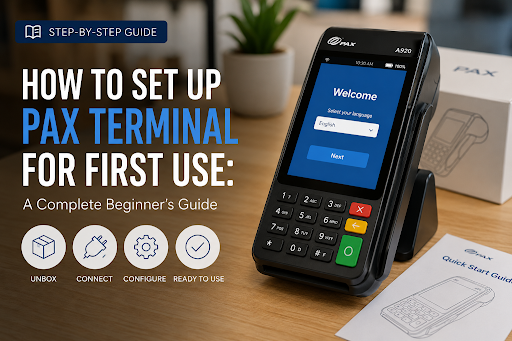
How to Set Up a PAX Terminal for First Use: A Complete Beginner's Guide
Setting up a PAX POS machine is easier and faster than it looks. Most businesses can get it working under 30 minutes without getting help from support. Whether you're setting up a countertop terminal or a portable device, this guide will navigate you step by step so you can start accepting payment smoothly.
PAX terminals are designed for retailers, restaurants, and mobile vendors who need mobile card reader devices. They are easy to use, but you still need to complete a few steps before working.
Get Started With Us
Fill in your details and we'll get back to you shortly.
Why Getting the First-Time Setup Right Actually Matters
Installation in a rush is the main reason that merchants will face a decline in payment or connection issues in their first week. Spending a little quality time to inspect your internet connection and test a transaction can avoid future problems, especially in busy hours when a frozen terminal means lost sales.
What You Need Before Starting Your PAX Terminal Setup
Before starting the PAX terminal setup, make sure you have all the necessary items ready.
- The terminal itself, charging dock, or power cable, and any included SIM card (for cellular models)
- A stable Wi-Fi network or active mobile data plan
- Your merchant account credentials from your payment processor
- A printed or digital copy of any activation code emailed by your provider
- A few minutes of uninterrupted time, since some steps time out if left idle too long
Having these all ready turns the whole process into a smooth, uninterrupted flow rather than a frustrating start-stop experience.
PAX POS Initial Setup Steps
Step 1: Unbox and Inspect the Device
Check the screen, card reader slot, and ports for visible damage. Plug in the charger or place the unit on its dock to begin charging while you prepare the rest of the setup.
Step 2: Power On and Run the Boot Sequence
Press and hold the power button until the PAX logo appears. The device runs a brief self-check, loading its firmware and default settings — let it finish without interrupting the screen.
Step 3: Connect to a Network
Here is the main question that arises: how to install the PAX payment terminal. Select the settings or communication menu and choose your connection type.
- Wi-Fi: Select your network name and enter the password.
- Ethernet: Plug in a LAN cable; the device should detect it automatically.
- Cellular/SIM: Insert the SIM card and let the terminal register with the carrier.
Step 4: How to Activate PAX Terminal
Once your terminal is linked to your internet, it will ask for a merchant ID or activation code from your payment provider or bank. Write it carefully because even a small error can make activation fail. After the code, the device will connect to the system and download your payment settings and pricing information.
Step 5: PAX Device Configuration Process
After completion of activation, you'll set up operational settings such as:
- Receipt printing preferences (paper or digital)
- Tip prompts and surcharge rules, if applicable
- Currency and language defaults
- Tax rate entries for your business location
- Auto-lock timing and staff PIN access, if your business needs multi-user controls
Save settings before moving to the next menu because some PAX models can't auto-save on exit.
Setting Up Your PAX Mobile POS Device
The setup is mostly the same if you are using a PAX mobile POS device for deliveries, a food truck, or temporary stalls. However, make sure your mobile connectivity works well in the areas where you use the device; a poor signal can cause trouble. Fully charge the battery before using it in a mobile device that works on battery.
Common First-Time Setup Issues and Quick Fixes
Even if you follow the PAX terminal setup guide carefully, you may still run into a few common problems during setup. Here are some of the issues that merchants experience most often:
- The terminal won't connect to Wi-Fi. Double-check the password and ensure the router isn't blocking new device pairing.
- Activation code rejected. Confirm there's no extra space or misread character; codes are case-sensitive.
- Printer not responding. Reseat the paper roll and confirm it's loaded in the correct orientation.
- Frozen screen during boot. Hold the power button for ten seconds to force a restart, then try again.
- Transaction declines right after setup. This is usually a sync delay — wait a few minutes and retry rather than reactivating the whole device.
Most of the problems happen due to a weak internet or incorrect credentials, not due to a hardware fault.
Tips for a Smooth PAX Payment Terminal Setup Step by Step
- Save your processor's contact number prior to installing your POS system, just in case.
- Test a small number of transactions straight away after installation for verification.
- Upgrade your firmware directly after activating; most manufacturers regularly update for better performance and security issues.
- Mark your various terminals when using several units to avoid confusion when setting up in the future.
- Make sure that another employee knows how to operate the settings menu as well.
Keeping Your Terminal Running Smoothly After Setup
Once you have set up your PAX POS system, some simple maintenance can go a long way in keeping it working efficiently. Reboot it now and then, make sure you install the software upgrades as and when required, and if it is a mobile unit, don't let its battery drain out.
Final Thought
Preparing your terminal shouldn't be an ordeal. Go through the process — unpack, turn on, plug in, enable, set up — and within minutes, you will have yourself a fully-functional payment terminal ready for actual use. Regardless of whether it's a countertop terminal or a mobile terminal that can be used out in the field, proper installation is the first step towards seamless payments each and every day.